Showing posts with label Gameplay. Show all posts

Thursday, 30 July 2026

Counter-revolution in Samarkand, Part I

In the early hours of a February morning in 1918, a train of scruffy soldiers pulls into a Bolshevik controlled station outside the ancient city of Samarkand.


This is scenario one, The Mutineers Attack!, from the excellent Red Dawn Rises! supplement for Setting the east Ablaze! rules.  It is certainly dramatic, judging by all the exclamations!

The scenarios in the book are great and inspired by Peter Hopkirk's equally excellent book on the Russian revolution in central Asia.


We used the third edition of the rules, by the only slightly less excellent Steve Langan, for this game.
 
This is what happened according to the official history.  

The sleepy guards are not expecting trouble but the soldiers disembark fully armed and ready to fight.
 

"MUTINY!" The Mensheviks have turned their former allies against the revolution and they are now fighting for the Whites!  
 
 
The small garrison of red guards run for the relative safety of the coal bunker. 
 
 
"Fire on the traitors, comrades!"


The Bolshevik gunners spring to their work and shells begin to land with pinpoint precision.

 
Chaos reigns in the mutineer ranks.  Their armoured car crashes off the ramp and immediately breaks down.


Some of them run and hide in the railway shed.


Others in the trees.


Captain Pernov pushes his men through a window into the hastily vacated station.


"More shells comrades.  Keep firing…Oh!" The Bolo field gun runs low on ammo. 


But all is not yet lost for the Reds, as their AA gun pours murderous fire into the station killing more of the mutineers.
 

What this defence needs is an inspiring and handsome proletarian hero. 
 

Fortunately, as the Red guards regroup in the coal bunker, they are joined by commissar Totzek after he heroically sneaked out the back of the hotel.  These dogged revolutionaries will be difficult to shift from behind those solid walls.
 

Wait! Stop! Where are you going?  Seduced by more Menshevik lies the guardsmen defect.


It’s okay thinks Totzek to himself, "I will persuade the mutineers over to me, with my deep understanding of class consciousness and dialectical materialism".  "Oh!  That didn’t go well."

 
"It'll be okay.  I’m sure nobody else heard me mess that up, and will therefore abandon me as a result. Oh!"  The Red AA gun also defects to the Whites.
 

Time to run for it.  [Ed: I don't have any pictures of the chase that followed, so you'll just have to imagine a cross between Dr Zhivago, Benny Hill, and the Keystone Cops, all to the soundtrack of Yakkerty Sax.]


Totzek makes it to the field gun and his last remaining comrades.  Who, fortunately, seem to have found some more ammunition.  Making every shell count they blast their former compatriots and send them running but Pernov rallies his men and begins the assault again.


The inept mutineers, driven on by Captain Pernov, struggle up the slope to storm the last Bolshevik redoubt but are thrown back by the stubborn defence.  Totzek empties his pistol into their ranks, killing another mutineer.
 
 
However, the numbers are overwhelming and our scene fades to black as poignant music plays and a battle damaged red flag waves gently in the breeze … 
 

... but what a twist!  The body of the commissar cannot be found! ...

Sunday, 27 July 2025

6mm Flames of War in the Desert

For a long time we've had a plan to play some Flames of War in 6mm using the early war desert lists in Hellfire and back! book.  We bought and quickly painted up some troops ages ago and then never got around to playing the game ... until recently.

We are using the old 3rd edition rules, which, as old gognards we prefer and never moved on from.  Battlefront have made all the old third edition books available via this web page here, and for free!  Which is pretty decent of them, if a bit surprising, given their rather commercial reputation.  The files can be accessed directly on this drive here.

This report is for our second game. The first game went very well for my DAK tank company.  racing east from Tripoli they encountered a British armoured force and the panzers destroyed all before them. The swift kradschützen bikers then dismounted to storm the objective for a convincing win.  The victory was marred only slightly by the heroic death of the company CO, Haumptmann Klutz.  He had advanced into 25-pdr range at the end of the battle, to draw fire from the infantry, and paid a heavy price.  The Luftwaffe support had also been quite rampant in game one, with this particularly successful bomb run putting paid to three British tanks.


So moving on, we join the Panzers - now under command of the blonde and youthful Leutnant Himmelsplitz - as they push deeper into Cyrenaica and encounter a formidable British gun line of 25-pdr and motor riflemen digging in.  The accompanying Luftwaffe boys dig in their 88 but cannot see the British guns clearly enough through the heat haze to open fire.

The panzers begin a wide flanking attack on the right, throwing up clouds of desert dust.


Stukas scream down on the infantry but are driven away by ferocious AA fire from just behind the British gun line.  The Tommies have learned from the first encounter and this is going to be a tougher nut to crack.

Suddenly fire rains from the sky as the 25-pdr make short work of the 88.  “We never even saw them until they opened fire” laments a stunned gefreiter Potz.

The panzers approach their supply dump objective but find it guarded by two British tanks.  They call the Leutenant  for back up and prepare to attack.

The panzers delay costs them time but eventually they go in with a well coordinated attack just as reinforcements arrive.

The original two Britischer panzers are quickly silenced but out of nowhere a horde of Tommy armour appears!

Meanwhile, more DAK reinforcements have taken up positions to defend the objectives they hold (a pair of downed Stukas with engine trouble).

The intense tank fight is brutal but the weak armour of the British tanks means even the 20mm guns of the Panzer IIs are effective.

There can be only ever have been one winner but the cost is considerable and both sides see their burning tanks litter the desert

Things get rather unclear from this point [I forgot to take enough photos] as the fighting went on into the dusk.  A British counter attack of Portee AT guns and armoured cars was destroyed but the light panzers strayed into the 25-pdr's direct fire range and were quickly shown their error.   The last bailed out armoured car was was assaulted and captured by the Kradshurschen platoon.

With only two Panzers remaining Leutnant Himmelsplitz assaulted the dug in riflemen as 25-pdr shells dropped all around him.   The day ended in confusion with both sides claiming victory*.

The test games were quite a success.  The British armour is not great under these rules but we liked the look of the 6mm figures.  I think keeping the ranges but using smaller figures helps with the 'car park' effect you can sometimes get in 15mm Flames of War. 


 *The motor rifles were broken in a second round of assault, which should have broken the British company but we forgot the company morale test and had the 25-pdrs fire, which destroyed the last panzer, which would have broken the unit except the Brits should already have broken.  We called it draw as it was late, we'd had fun and we were on about turn 19 by this point. 

Wednesday, 11 June 2025

Heliopolis, the first try

This was our first try of the Heliopolis scenario.  We didn't finish the game as we're still not very familiar with the rules but it was a decent test.


Set up initially uses blinds to hide deployment from the enemy.  If the units move they are revealed.  Also, enemy units within 12" of a friendly unit are revealed at the start of your turn.

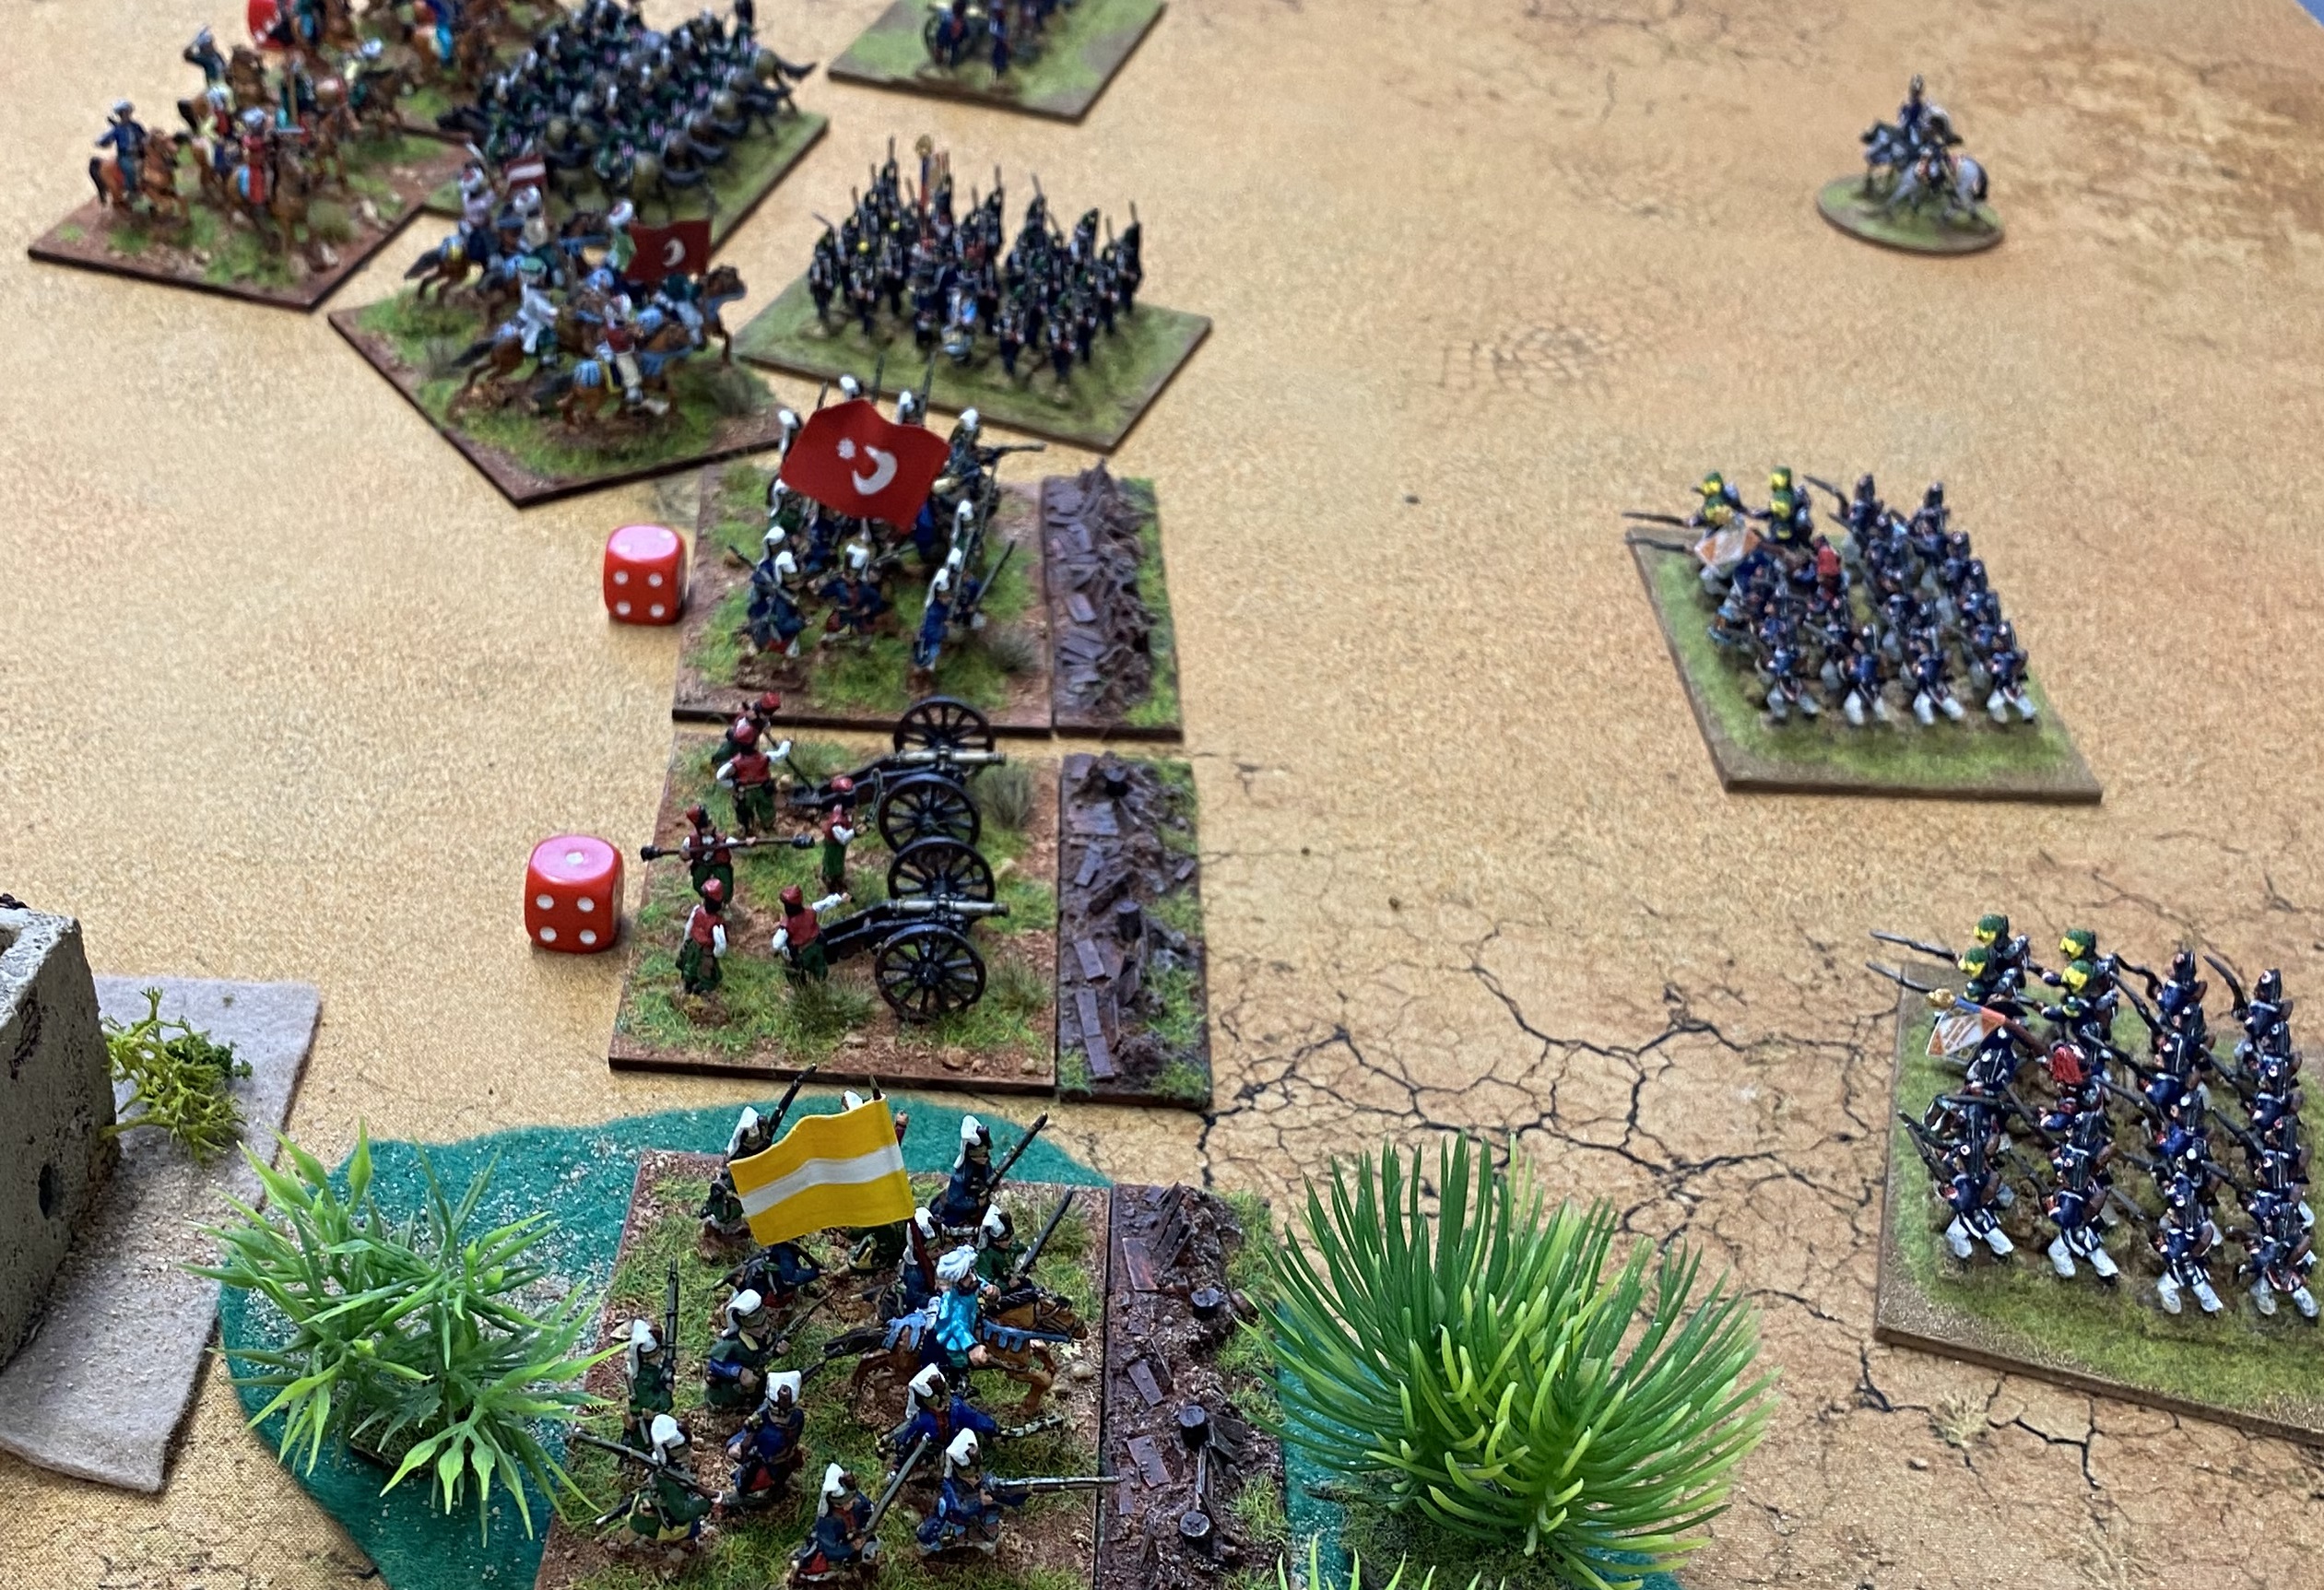
The French deployed with their cavalry in the centre and advanced towards the forward Ottoman units.

Here, the French are attempting to flank the Janissary trench line, while the Ottoman cavalry launch spoiling attacks.  The Janissaries are losing the resulting firefight.

Two units of Mamelukes gang up on the French dragoons and a unit of Delis charge the flanking infantry. 

French skirmishes and attached artillery firepower breaks the end of the Janissary line.  The Dragoons are thrown back however, and the French infantry hastily form a prepared defence under pressure from the Mamelukes.    

The French infantry on their left storm the trench line and overrun the guns but the village is still help by a garrison of Janissaries.  The unit on the French far left flank held against a Mameluke attack but was forced into a prepared defence.  Another unit of Janissaries charged out of the palm groves and will soon destroy a French demi-brigade in close fighting.  They then pursued the fleeing fusiliers off the southern table edge into Cairo, from where they can raise the Fellahin in revolt.

The French and Ottoman cavalry clash on the right of the field near the ruined mosque.  The Hussars and Chasseurs send some Turkish horsemen packing but the Guides and Dromedaries cannot hold onto their flank.

Lacking infantry support and with the French forming prepared defences the Ottoman horsemen pulled back to regroup with a line of fresh reserves that had come up from the main army.

With time running out and the French heavily on the defensive we called it a day and headed home.

Here are a few bases I knocked up to give the battlefield a bit of ancient character.   They are meant to signify the Roman and Hellenistic ruins that dotted the area.

Not a bad first test.  It remains to be seen if the french can successfully advance in the face so so many sabre wielding horsemen but the rules seem to work well.  We may eventually need to add some house-rules for the "carré d’Egypte." but I think we should persevere with the rules as written for a bit longer.